I have a few versions of how to conceal these pesky marks, but the one I'm sharing today seems to be working the best in this summer heat. There are 5 or 6 steps, which may seem like a lot if you're used to just using a concealer and maybe foundation and powder and hoping for the best. All the products are applied in relatively thin layers, because I feel like the only thing that looks worse than my acne is my acne plus a mountain of makeup.
Before we begin, make sure your face is washed and you have dried your skin. (*note: just like every picture on The Land of Lady Things, I haven't edited or retouched my photos in any way, other than cropping them so they won't take 8 years to download.)
 |
| Clean as a whistle! |
Step 1: Moisturize/Prime
For this step, I used Kat Von D's Rehab Primer Elixir. It moisturizes my oily skin just enough, and it cuts down on unbecoming shine. Plus, I'll be using a moisturizing product with sun protection later. Feel free to use whatever products suit your skin type, but please, for the love of Pete, use sunscreen! Daily sun exposure can make scars worse (on top of giving you wrinkles and increasing your odds for skin cancer).
Step 2: Correcting Green Concealer
Green concealer is your best friend if you have any redness that you need to combat. Green is the opposite of red on the color wheel, so in theory, green cancels red out. I personally use Clinique's Acne Solutions green concealer because there is salicylic acid, a known acne warrior, built right in; but, there are plenty of companies that make non-medicated green concealer if that better suits your needs. I use this after my skin has been moisturized, because it I'd have a lot of trouble blending it in if I applied it to dry skin. Today I used my (very clean) fingers to apply my makeup, but sometimes I'll use a concealer brush for a more precise application.
 |
| After green concealer-- the redness is already starting to disappear! |
To even out my complexion, and help blend that green concealer in a little better, I apply tinted moisturizer. I personally use Urban Decay's Urban Defense (check out my review here), but feel free to use whatever tinted moisturizer you like.
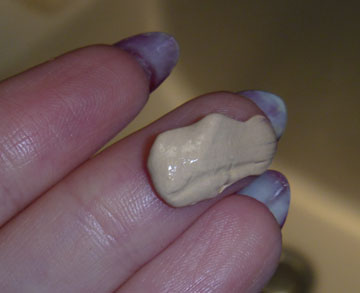 |
| This is the amount I use on my entire face. |
 |
| After Step 3 |
The next step is applying flesh-toned concealers. Yes, concealer plural. Don't be too scared, I just use two-- a lighter one and one that matches my face. The lighter one helps to further lighten the redness (you can also use it as a matte highlighter on the high planes of your face!) and the one that matches my face evens the light spots out. I personally use Kat Von D's Tattoo concealer because the texture is really light, it's pretty densely pigmented and really long-wearing.
 |
| After lighter concealer (KvD's Tattoo Concealer in "Porcelain") |
 |
| After skin-matching concealer (KvD's Tattoo Concealer in "Light") |
After I'm satisfied with how well-concealed my face is, with a kabuki brush I brush on powder foundation that matches my skin tone. I personally use MAC's Studio Fix compact foundation because it rules, but if you have something you like better go ahead and use it. This step helps set all the previous makeup, further even out my skin tone/help conceal my spots, and give me a soft matte finish.
 |
| After MAC's Studio Fix |
Sometimes after I put on the rest of my makeup, or just after I put on blush, I'll spray my work with makeup setting spray (I use Urban Decay's De-Slick or All Nighter setting sprays). It really does keep your makeup from sliding around if your skin gets super oily, and keeps shine at bay for just a little longer.
 |
| You can read the breakdown of my eye look ( I used the Angeles palette) here |
So there you have it-- a way to conceal your acne spots/blemishes without globbing on foundation and concealer and hoping for the best. The key is to work in thin layers, and with products that are highly pigmented. If you're on a budget, I advise you to invest in a good flesh-toned concealer. None of the products I use are really budget-friendly, but you can find many good substitutes for most of the products I use at your local drug store.
Eventually I'm going to post other methods I use to conceal my spots, but what are ones that work (or don't work!) for you? Please let me know in the comments!
No comments:
Post a Comment
Thanks for the feedback! Please check back (or subscribe!) for replies!