December 8, 2011

Holiday look 2: Blue and silver smoky eye

Hello!  Here's another holiday look that's NOT a gold eye with a red lip!  This was inspired by the blue and silver that's associated with Hanukkah at this time of the year. I used a coral blush and lip for a bit of a contrast, but this will look great with pink and berry tones.

Before I put the color on, I applied my face makeup and put primer on my eyes.

Eyes
Step 1: Apply a blue shadow to your lid,


  and halfway across your lower lash line.

Step 2: Apply a medium silver shadow to the crease, blending it slightly into the blue.

Step 3: Apply a gunmetal shadow to deepen the outer corner of your eye. I also applied it about half way across my upper lash line.

Step 4 & 5: Add highlights to the inner corner and brow bone, blending the surrounding shadows together. Then I filled in my brows a bit. I just dyed them yesterday, so I didn't go as crazy as I normally do.

Step 6 + 7: Line your upper and lower waterlines with black eyeliner-- I also traced the pencil 3/4 of the way across my top lash line and diffused it a little bit. Then I put on a thickening mascara.  Feel free to put on false lashes for an ULTRAGLAM look!

Lips: Just swipe on a coral lipstick and add gloss to the center of your lips. Super easy!

The final product:

What I used:
Eyes
all products are Kat Von D except where noted otherwise
*Speed Blue e/s
*Razor Gray e/s
*Lucifer (on brows)
*Holy Bible e/s
*Puro Amor autograph pencil
*Sin-full mascara
*Urban Decay Gunmetal e/s
*Urban Decay Primer Potion

Face:
*KvD Rehab Priming elixir
*KvD tattoo concealer in Light and Porcelain
*L'Oreal True Match foundation
*Benefit Coralista blush
*Make Up Forever HD Powder

Lips
*KvD Painted Love Lipstick in Coral Castle
*Smashbox Lip Enhancing gloss in Pout

What kind of look do you go for during the holiday season?

December 6, 2011

Holiday look: Green and Silver

(Since the winter holidays are nearing, holiday makeup tutorials have been popping up everywhere.  Almost every one I've seen has involved a shiny or sparkly gold eye/red lip combination! While gold and red does make a lovely combination, it's not the only one out  that reads "Holiday." 

Note: before I started, I applied my foundation and concealer. Normally I use Urban Decay's Primer Potion before I put on my eye shadow, but today I used Cover FX cream foundation to experiment.  More on that later.


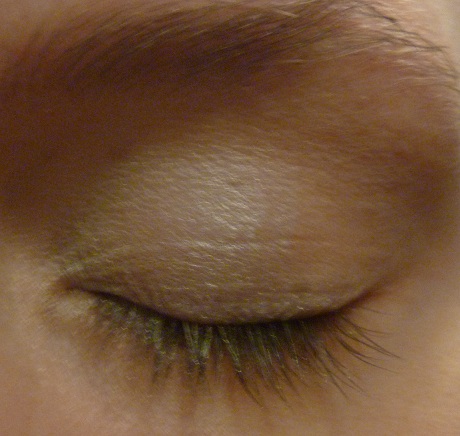
Step one: Apply pale silver eye shadow from inner corner to the middle of your eye.

Step two: Apply dark green eye shadow at lash line and in outer corner, and blending it out a bit.

Step three and four: Apply mid toned green adjacent to the dark green and in the crease, then blend blend blend! If you find that you want to make the look a little darker, you can add more of the dark green eye shadow. Then take a highlighting shade (I used a white/green duochrome, but you can use the pale silver color from Step one), and apply to the inner corner/tear duct area and on the brow bone, blending it into the green shadows.

The rest: From here you can easily turn this into a smokey eye with either a black or dark green pencil liner. My personal look of choice today was winged eyeliner. After my eyeliner, I applied a thickening mascara, then a lengthening mascara.


Lips: I put on lipgloss first, and then my lipstick.  I find this makes the color of the lipstick sheerer, and it doesn't mess up my lipgloss applicator!

Finished look:


What I used:
Eyes
(The following is all by Kat Von D, except where noted)
-Lucifer e/s (matte black) used on brows
-Holy Bible e/s (pale silver)
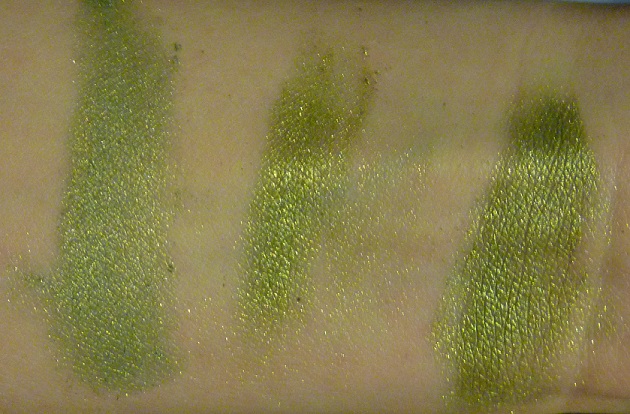
-Gunner e/s (dark green with green glitter) *
-Ego Sum e/s (shimmering medium bright green)*
-Hawkwind e/s (shimmery white with green flash)*
-Autograph pencil Puro Amor (black)- used to tightline
-Autograph eyeliner in Puro Amor (matte black) This is my liquid eyeliner of choice!
-Sin-full mascara
-Urban Decay Lush Lash Mascara
*These shadows are from the limited edition Gypsy palette.


Lips
-Smashbox Lip Enhancing Lipgloss in Pout (candy pink with subtle shimmer)
-Urban Decay Lipstick in Rush (sheer glossy mauvey-pink)

Face
-L'Oreal True Match Foundation (not a huge fan of this)
-CoverFX cream foundation (used as concealer) (not a huge fan of this either)
-Tarina Tarantino Pearl Glow primer
-MAC Pink Swoon blush
-Urban Decay Razor sharp defining powder

So there you have it! A silver-green eye with a pale pink lip.Now that I think about it, this is reading a bit mod, and it's making me want to put my hair in a beehive! Anyway, this is one of those looks that can definitely be tailor-made to suit your style. (want something more subtle? How about a wash of silver over your eye paired with some green eyeliner? Stronger? How about keeping a smudgey black around the eye,k and then using greens to blend it out?)

. If you liked this look, please stay tuned! I've got more holiday-inspired looks coming up!.

What's your favorite look of this season? Let me know in the comments!


November 29, 2011

Review: Benetint Balm


Benetint balm is a gel balm from Benefit's Benetint family. Unlike the original Benetint, this isn't much of a stain, rather it's a sheer rosy blush.  It's moisturizing, but I wouldn't count on this to restore incredibly dry, flaky lips. The texture is very light, and while it's glossy, it's not sticky. It's also got some built in sun protection- SPF 15.

Left: Benetint balm as is. Right: Benetint balm evened out, as you'd apply it to your lips.

This is rose scented. I've got a sensitive sniffer, and didn't find the scent terribly unpleasant.  It did fade within a few minutes.


The packaging is a pretty straightforward screwtop tub and houses 0.23 g of product. I personally prefer packaging with applicators because it makes applying on the go much easier (and sanitary), so this definitely isn't ideal.

Overall, I don't think all of the elements of the Benetint balm make it worthy of a re-purchase for me. That's BEFORE considering its $20 pricetag!

You don't have to take my word for it. It's available now at Sephora.

November 28, 2011

Review: Urban Decay Lush Lash mascara


Urban Decay's Lush Lash mascara is a lengthening mascara infused with a lash growth serum. I don't use it every day, so I can't really attest to the effectiveness of the serum, but this does its promise of lengthening lashes. This also works well if you layer mascaras-- I sometimes use this in conjunction with my KvD mascara to add more length to the volume that mascara offers.

The brush is unique to any mascara I've ever tried.  It has these hard spikes that are excellent at really defining the hairs and eliminating clumps, but they're very uncomfortable if you get them super close to your lash line.


Before

After!

All in all, I really like Lush Lash.  Even though I prefer curling mascaras, it's a great no-fuss product that is very welcome in my makeup collection. Once this runs out, I'll  definitely be re-purchasing.

You don't have to take my word for it.  It's available now at Sephora.

Review: Kat von D True Romance palette --Saint


Kat Von D's Saint palette is the first palette of all neutral shadows from her line.  Like all of her palettes, it comes with the standard eight shadows, and like the other new palettes that came out this fall, it comes with an eyeliner and a sample of the High Voltage Eye Primer.

I hesitated to pick this up when it came out in September because I thought it would be too similar to Urban Decay's Naked palette and/or some of the pigments I have from the brand (namely Rapture, a metallic peach with a golden shimmer). The only color that proved to be similar enough to something I already have is luckily something I really love. Also, I never really look at the weights of shadows, but the eight shadows in the Saint Palette are 1.4g a piece, vs Urban Decay's 1.3g. Sure, this has 8 shadows vs the Naked Palette's 12, but this costs $13 less. Even though the colors in this aren't really like those in the Naked palette, if that $48 price tag hurts your wallet, this may quell your hunger for a neutral palette.


L-R: Heavens, Enjoy the Silence, <3, Downtown

Heavens: Frosted cream. This came out slightly sheer, but I LOVE this as a highlight color, so I'm not mad.
Enjoy the Silence: Frosted pale pinkish champagne
<3: Matte pastel pink with multicolored glitter. As you can see in the swatch, the glitter didn't stick at all!
Downtown: Metallic bronze-y peach (previously appeared in the Ludwig palette)

L-R: Sunny, Pray for Me, Bookworm, Caravaggio


Sunny: Metallic dirty gold. This is very similar to Urban Decay's Half Baked, which leans more yellow.
Pray for Me: Warm brown with dirty gold shimmer. I was a bit disappointed with how sheer this was
Bookworm: Matte brown with gold sparkle. I thought this was similar to Urban Decay's Darkhorse, but this has more of a red tone and doesn't have a metallic finish.
Caravaggio: Greyed matte brown


Puro Amor eyeliner: Deep matte black. I don't know if it's me, but I feel like this is less black than the eyeliner that came with my Sinner palette.

PACKAGING: While the metal case looks so much more elegant than the rubberized plastic packaging of the prior palettes, I'm not a fan of how the mirror doesn't stay up when the palette is open.  I was also concerned about the shadows breaking more easily because something about this packaging seems less sturdy, but I've been taking this everywhere with me, and so far so good!
PRICE: $35 for 8 shadows + eyeliner.

You don't have to take my word for it, the Saint palette is available now at Sephora.

Review: Kat Von D True Romance Pigment in Conquer


Hi! Hope everyone  had  a good  holiday.  Did anyone shop the sales over the weekend? I shopped a little before Thanksgiving and picked up the other KvD pigment exclusive to the Sephora inside JC Penney. The shade, called Conquer, is a metallic light yellow green with a yellow gold sparkle.

This pigment is another hit for for me.  It applies smoothly and evenly, and I think it looks just as good wet as it does dry. The texture of this is as good as Meditation, but I haven't worn it yet so I can't speak of the fallout factor.  Then again, I always wear eye primer so I rarely have fallout problems throughout the day.


Left- swatched dry Right- swatched wet

When I first laid eyes upon this, I thought it was too similar to "Dimebag" from the Ludwig palette, but Conquer is definitely warmer and has more of a metallic finish.
Left- Dimebag. See how much cooler-toned it is? (natural lighting)

Dime bag (l) and Conquer (r) in indoor lighting

You don't have to take my word for it-- it's available now exclusively in Sephora inside JC Penney.

November 16, 2011

Review: Nails Inc. Magnetic polish

Recently I was in my 2nd home, Sephora, and the nails Inc. Magnetic polishes that i've been dying to try were out! I only meant to test it on one nail, but was so impressed i had to do all ten digits right then and there. Unfortunately my computer is broken, so I can't show you guys the results, but trust me-- this stuff is amazing. The color I have on is Trafalgar Square, a metallic gunmetal grey. It's pretty enough on it's own, but after it's gotten the magnetic treatment it gets these lovely black stripes. If that's not enough, the design is lenticular! (the design appears to travel when you move your nail back and forth. In other words, THIS GIVES YOU NAILS FROM THE FUTURE.) Although I can't show pictures right now, this is one of those rare products that looks exactly as it does in its advertisements. As for wear, without a top coat, it chipped within the first few hours. I applied a top coat later, and now am four days into the manicure with minor wear at the tips. How does it work? There are magnetic particles in the polish that react when a magnet is held over the wet nail. It works best when two coats were applied-- a thin first coat followed by a thicker second coat. Then you hold the magnet over each nail for about 15 - 20 seconds et voila! Instant, easy, and awesome nail art. All in all, this nail polish rules. The effect is so cool, and it dries so fast that you won't spend forever painting your nails. It also comes in gold and a smoky greyed purple if you're not to keen on the grey. I guess the only Thing that could be annoying for some is that when painting the second coat, you have to put the magnet on immediately after you paint the nail or the striations won't occur. You don't have to take my word for it, it's available now at Sephora.